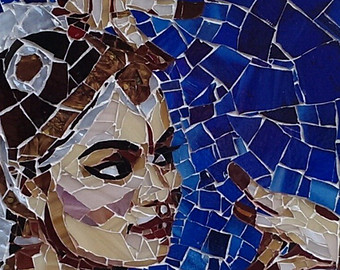
Make a stained glass mosaic portrait from a photograph
Materials and Tools:
enlarged photograph,mat board,masking tape,clear adhesive shelf liner
several colors and shades of opaque stained glass,plastic containers,glass cutter
square-nose pliers,glass nippers,tweezers,diamond wheel glass grinder,safety glasses
latex gloves,black felt-tip pen,ultra-sticky clear adhesive film,piece of tile backer board (cement board)
craft knife,epoxy adhesive,notched trowel,roll of paper towels,instant glue,premixed grout,rubber float
sponge,picture frame,books (for weight)
Steps:

1. Tape the enlarged photograph face to a piece of mat board.
2. Cut a piece of clear adhesive film slightly larger than the photo.
3. Tape the adhesive film, sticky side up, over the photo with masking tape. The paper backing covering the adhesive film will be facing up.
4. Cut through the paper backing of the adhesive film with a craft knife. Then peel away portions of the paper backing to expose parts of the photo, starting with the face. If the entire photo is exposed, it tends to pick up dust from the room and reduce the stickiness of the adhesive.
5. Wearing safety glasses, score glass of assorted colors into strips with a glass cutter and break them with square-nose pliers.
6. Cut pieces of stained-glass strips into a variety of sizes with glass nippers. Store the pieces in plastic containers divided by colors.
7. Place the mosaic pieces on the adhesive over the photo. Use the photo as a guide to create the portrait. For some sections of the face, such as the eyes, the glass pieces will need to be ground on a glass grinder to achieve the right shape or smoothness.
8. Once the design is complete, place a stickier clear adhesive film over the top of the mosaic. Use a paper towel to smooth the adhesive.
9. Trim the edges of the adhesive film with a craft knife. Grab the edges and gently flip the piece over.
10. Peel away the less sticky adhesive film, leaving the glass adhered, face down, to the stickier film.
11. Cut a piece of cement board the same size as the photograph.
12. Mix the epoxy adhesive and trowel it onto the cement board.
13. Carefully pick up the film and the glass and put it on the cement board. Place heavy books on top to weigh it down.
14. Let the mosaic dry overnight.
15. Slowly peel away the clear face mounting film from the glass. Occasionally, the odd piece of glass won't have stuck and comes up with the sticky film-reattach it with instant glue.
16. Spread premixed grout over the tiles with a flat trowel, getting it into the cracks. With a damp sponge, wipe down the tiles to remove the excess grout.
17. Put the portrait in a picture frame.
Tsianfan industry has a team dedicated to providing you with the most cost effective solutions for design and manufacturing Mosaic Tile Frame.More info ,please click our website:stonepackingcase.com
没有评论:
发表评论